ROTATOR CASTING INSTRUCTION:
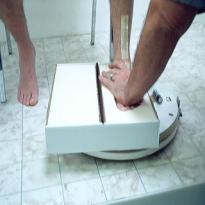
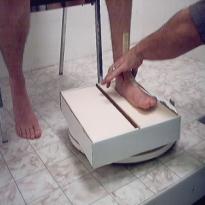
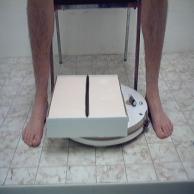 (Figure 1) Have the patient sit in chair. Place Rotator in front of chair like a clock, and make sure the hand brake is locked in place at the black oval. Place cast foam box on the Rotator against rails with lid open. (The lid in this picture was cut off to give you a better view). Patients left foot should be on the floor on the left side of the Rotator and the right foot on the floor on right side.
 *Note: You might find that the box lid from the 1” cast box is in your way while casting. If this is true, then just fold the lid completely over so it points down toward the floor. Then hold the box and lid squarely against a wall. Finally, fold the lid up underneath the box to make an even crease.
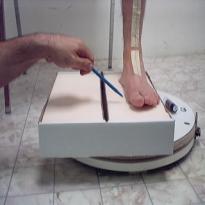
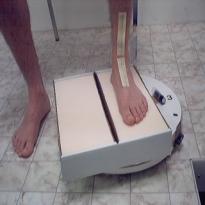 (Figure 2) Slide Rotator with box to the right, (approximately 4”) to center right side of box in front of patient’s left leg. At the same time, hold the left foot up over the box. Place heel about 1” from back edge of box and center foot in middle of foam
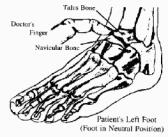
 (Figure 3 ) Place left hand over left instep with index finger on the inner space of talus and navicular bones (See Fig A ) thumb should be on the outside. Unlock hand brake with your right hand, while the left hand is on the foot and the right hand is on the ROTATOR. Turn the rotator clockwise to lift heel into neutral and lock mid foot in place, which will bring arch up to its right place then lock the brake.
 Note: When an impression is taken by simply stepping into the box, it is impossible to know how much to raise and correct the foot. The reason you must cast in subtalar neutral is as equally important as the reason for giving your patient an orthotic. You want to control and correct the patient’s foot. For the orthotic to be made properly, we must receive an accurate impression of the foot. When you send in a corrected foot we can make an orthotic to compensate for the corrections. Just as fitting a patient with a back brace. First, wouldn’t you straighten their back, before applying a brace?
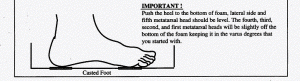
 (Figure 4 )Picture shows heel and in-step in neutral position. In 80% of all feet you will find that the fore foot has a varus deformity. The first, second, and third metatarsals will be above the top of the foam (See Fig B) Later when the fore foot is pushed down you must keep the angle all the way down to the bottom of box.
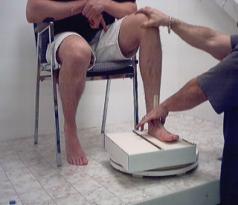 ( Figure 5 ) Place right hand on the patient’s left knee and push knee and instep down at the same time. So the heel goes to the bottom of the box.
 ( Figure 5 ) Place right hand on the patient’s left knee and push knee and instep down at the same time. So the heel goes to the bottom of the box.
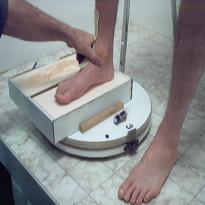
(Figure 7) The right hand should still be on left knee. Place right back part of palm over the heads and if your hand is narrower than the foot be sure to use the medial part of palm on the fifth metatarsal and the rest of palm on 4, 3, & 2. Next push all of the metatarsal heads down keeping your palm at the same angle the fore foot was in when you set the foot in neutral. Until the fifth metatarsal stops approximately 2 inches at the bottom of the box. Do not roll across the heads and push the first metatarsal down.
 (Figure 8) Push toes down
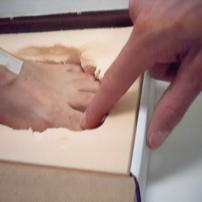
 (Figure 9) Place the left thumb finger on the cuboid and push a little just to seat it.
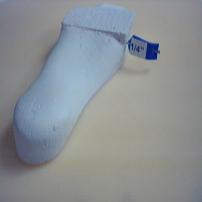
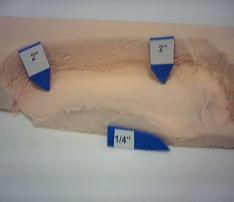 (Figure 10) Shows a proper cast, the heel and the lateral side of the fifth metatarsal is approximately 2 inches down at the bottom of the foam. And the first metatarsal is ¼” off the bottom of the box, which matches the fore foot deformity when the foot was first set in neutral as in figure 4. It’s important to keep the palm of your hand at the angle the fore foot is in when the heads are pushed down.
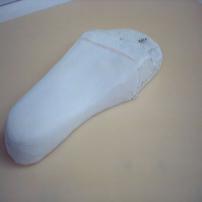
 ( Figure 11 ) Once you have casted one foot do the same to the other foot.
 ( Figure 12 ) The plaster cast shows where the ¼” post was added into the cast to fill in the missing space. This balances the deformity in the fore foot, so your patient can toe off evenly and walk more in the middle of the foot. It helps to track the knee and hip forward.
 ( Figure 13 ) The picture shows the cast completely modified before the orthotics are vacuum formed.
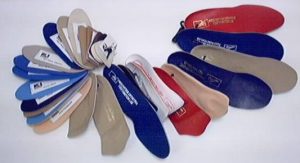
You can also order our Demo Kit